Kite Bill Guide
Everything you need to run your shop's billing, stock, payments and GST in Kite Bill — on the website, the Windows / Mac / Linux app and the phone app. One login, one set of books: a bill made on the phone is the same bill on the computer.
1First-time setup
Five minutes now saves you time on every bill. Do these once, in this order.
- Sign in. Open Kite Bill and sign in with your email or mobile number and password. The computer stays signed in until you press Sign out.
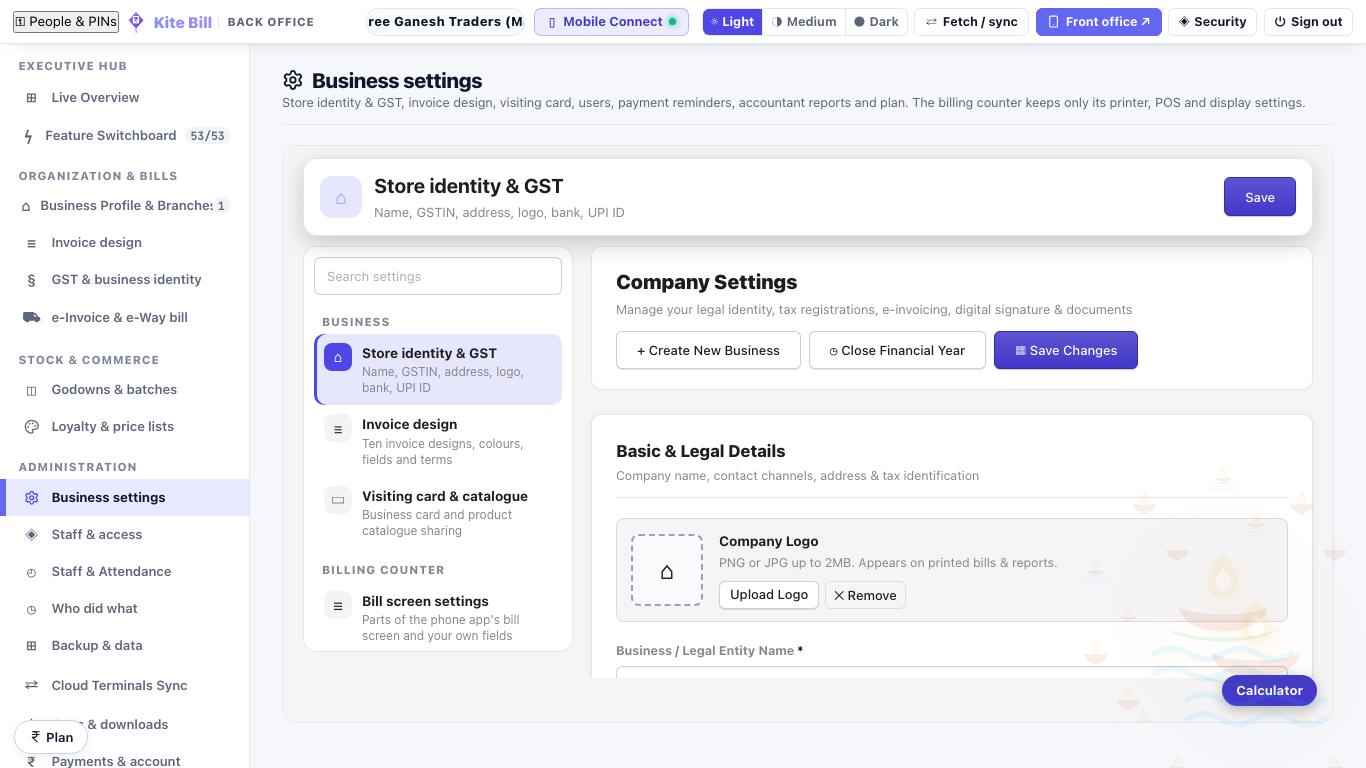
- Business details. Open the Back office (owner only) → Business settings → Store identity & GST: shop name, address, state, GSTIN, phone, logo, bank and UPI. These print on every bill and fill the GST reports.
- Invoice design. Back office → Invoice design: the design and colour of your bill, which details show, terms and conditions, signature and stamp. The bill number series is set from Numbering on the invoice itself.
- Printer. On the counter computer, Settings → Printer & hardware: choose A4 or thermal (2-inch / 3-inch), the cash drawer and the barcode scanner.
- Items and parties. Add your items (or import them from Excel / Tally) and your regular customers and suppliers. You can also add them while billing.
- Staff. If others will bill, add each person under Back office → Staff & access with only the access they need.
2The Kite Bill screen
Three parts: the top bar, the menu on the left and your work in the middle.
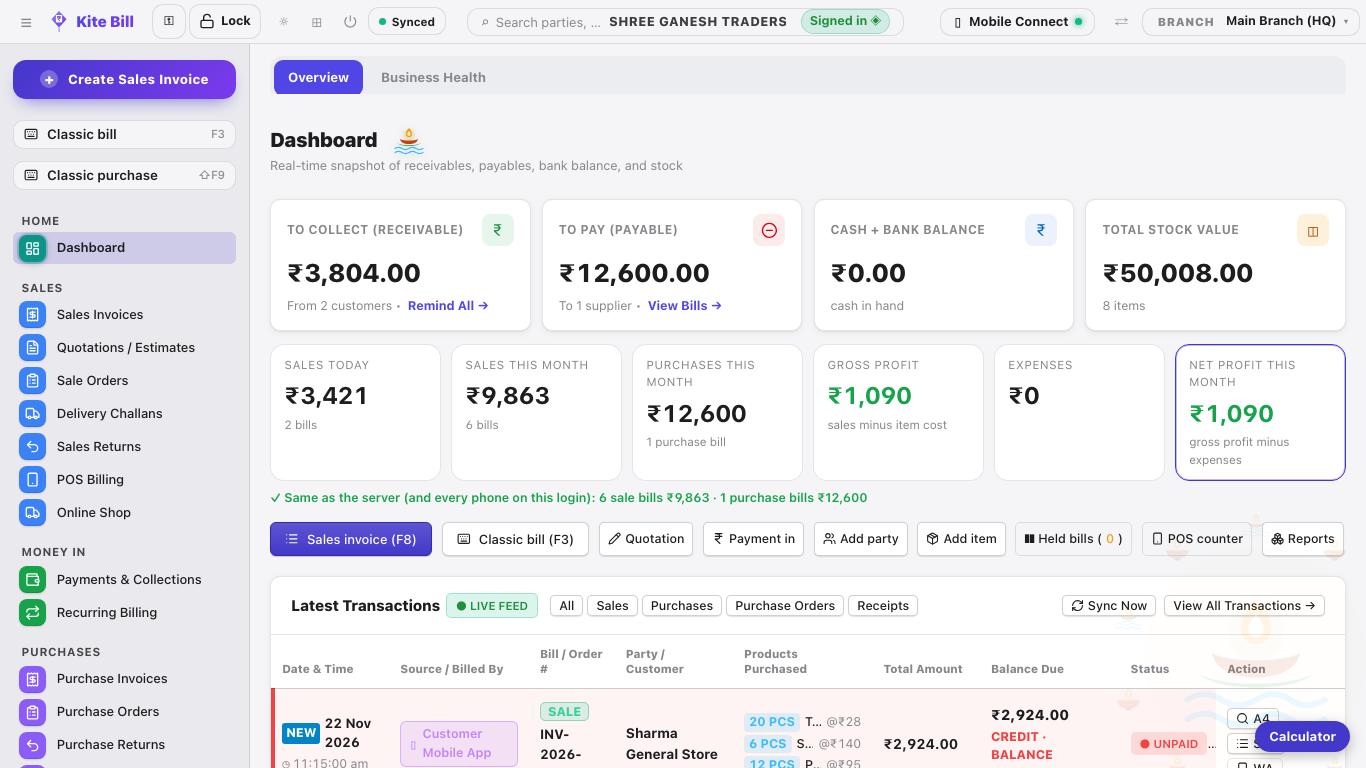
Top bar
Search anything (Ctrl + K), the sync status (Synced means the server has everything), screen lock, light / dark look, Mobile Connect and the branch you are working in.
Left menu
Grouped the way a shop works: Sales, Money in, Purchases, Parties, Inventory, Accounts, GST & reports, Settings. Ctrl + B folds it away for more room.
Dashboard
To collect, to pay, cash + bank, stock value, sales today and this month, gross and net profit. Click a card to open the list behind it.
"Same as the server"
The green line under the cards counts this computer's bills against the server. When it is green, every phone and computer on your login shows the same books.
3Making a sales invoice
The full GST tax invoice, with every detail. Press F8 from anywhere, or Create Sales Invoice at the top of the menu.
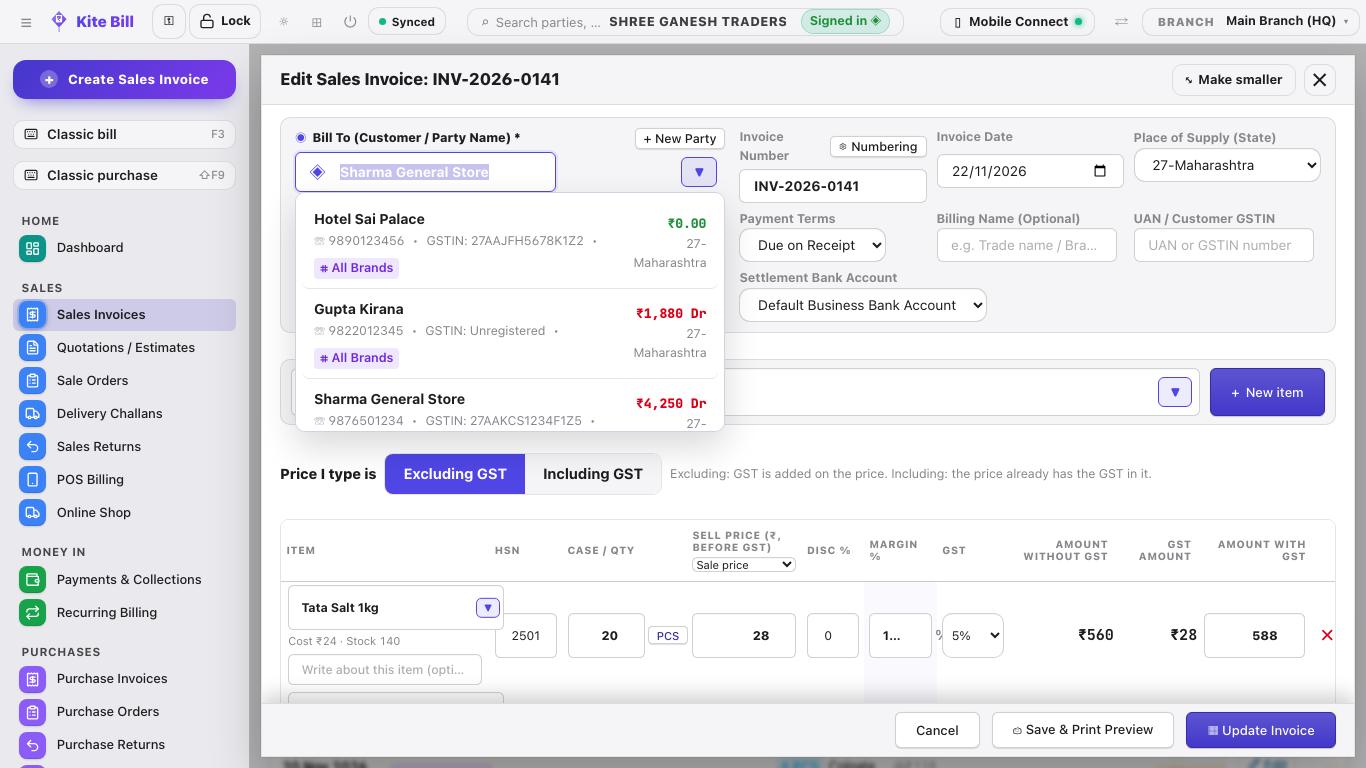
- Customer. Type the customer's name or phone in Bill To and pick them. For a counter sale, choose Walk-in Customer. A new customer? Press + New Party — only the name is needed.
- Bill details. The number and today's date fill themselves. Check the Place of Supply (it decides CGST + SGST or IGST) and the payment terms.
- Items. Search an item by name, barcode, brand or HSN, or scan the barcode. Type the quantity; the price, GST and HSN come from the item. Change the price or give a discount on the line if you are allowed to.
- Price with or without GST. Price I type is: Excluding GST adds GST on top; Including GST means the price already has GST in it. Kite Bill splits it correctly either way.
- Payment. At the bottom, enter what the customer paid now and how (cash, UPI, card, bank). Anything unpaid stays as the customer's balance.
- Save. Save & Dispatch saves the bill; Save & Print Preview saves it and opens it to print or share. Ctrl + S also saves.
Changing or cancelling a bill
Open the bill from Sales Invoices and press Edit bill. Stock and the customer's balance are corrected by themselves. If the owner has set an owner PIN, changing or deleting a saved bill asks for it.
4Classic bill — billing from the keyboard
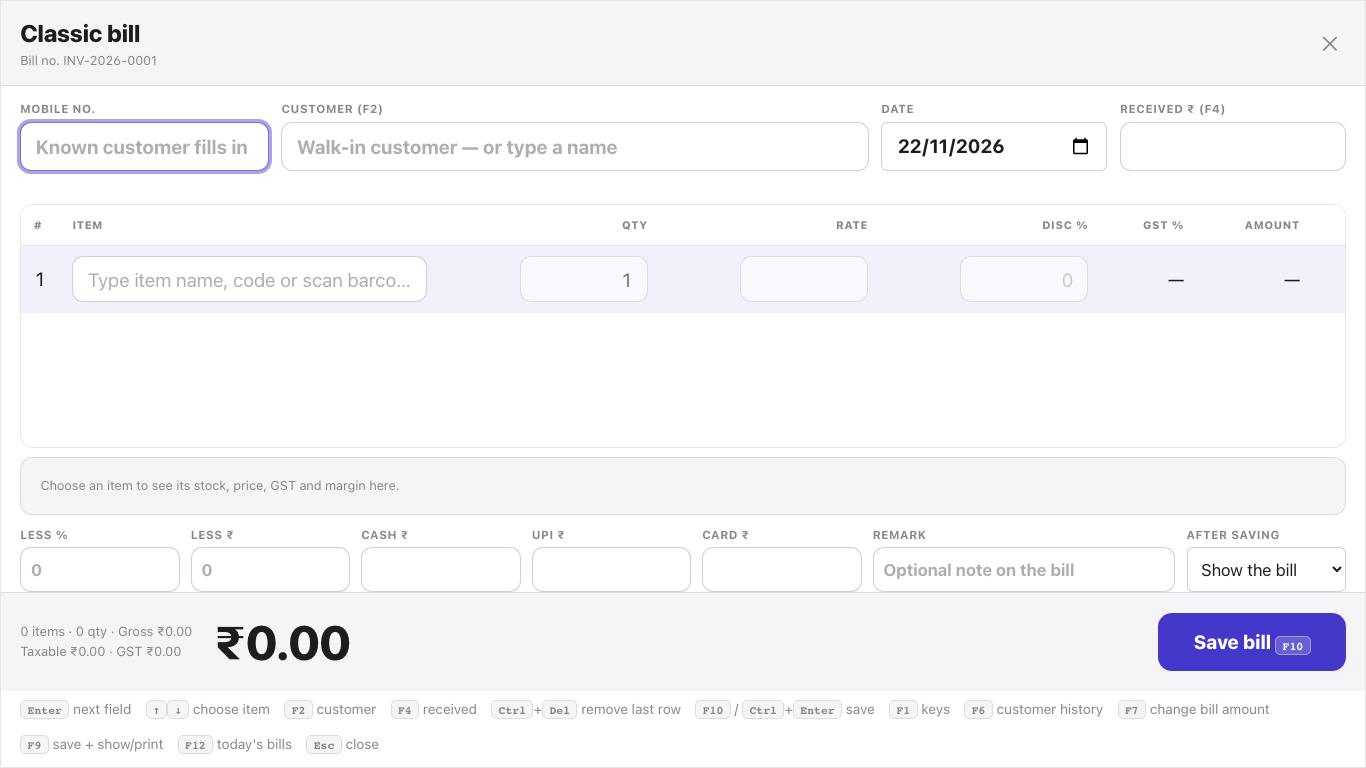
For fast counters that bill all day without a mouse. Press F3.
| Key | What it does |
|---|---|
| Enter | Next box. On an empty item box it jumps to the totals. |
| ↑ ↓ | Choose an item from the list. |
| F2 | Customer name. |
| F4 | Amount received. |
| F6 | This customer's earlier bills. |
| F7 | Change the bill amount — type a discount like 5% or the net amount you want. |
| F9 | Save, then show or print as chosen in "After saving". |
| F10 or Ctrl + Enter | Save quickly, without printing. |
| F12 | Today's bills. |
| Ctrl + Del | Remove the last line. |
| Esc | Close the window or the bill. |
The same keyboard style is available for purchases: Classic purchase, Shift + F9.
5POS counter
Touch tiles or a barcode scanner, a cart, and one key to take the money. Open POS Billing in the menu.
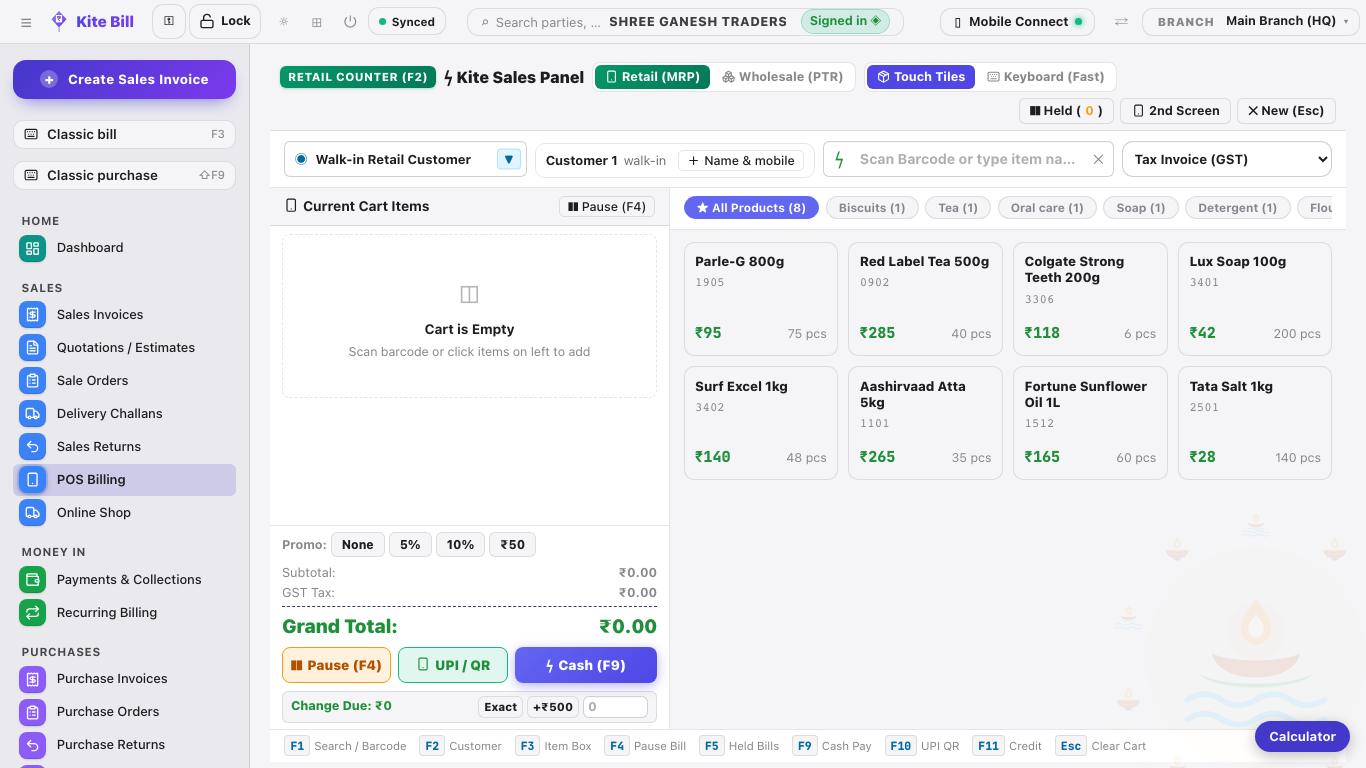
- Add items. Scan the barcode, type in the search box (F1), or tap a tile. Scanning the same item again adds one more.
- Customer. Leave Walk-in or press F2 to choose a customer; Name & mobile saves a walk-in's details on the bill.
- Take payment. F9 cash, F10 UPI QR, F11 on credit. Type the cash given to see the change due.
- Pause a bill. F4 holds the cart while you serve the next customer; F5 brings held bills back.
Retail or wholesale
Switch between MRP (retail) and PTR (wholesale) prices at the top.
Touch tiles or keyboard
Touch Tiles for touch screens; Keyboard (Fast) for scanner and keyboard counters.
Second screen
2nd Screen shows the customer the items and the total on another monitor.
UPI QR display
With a Wi-Fi QR display set up, the customer sees the exact amount to scan.
6Print, PDF and WhatsApp
Open any bill to see it exactly as it prints.
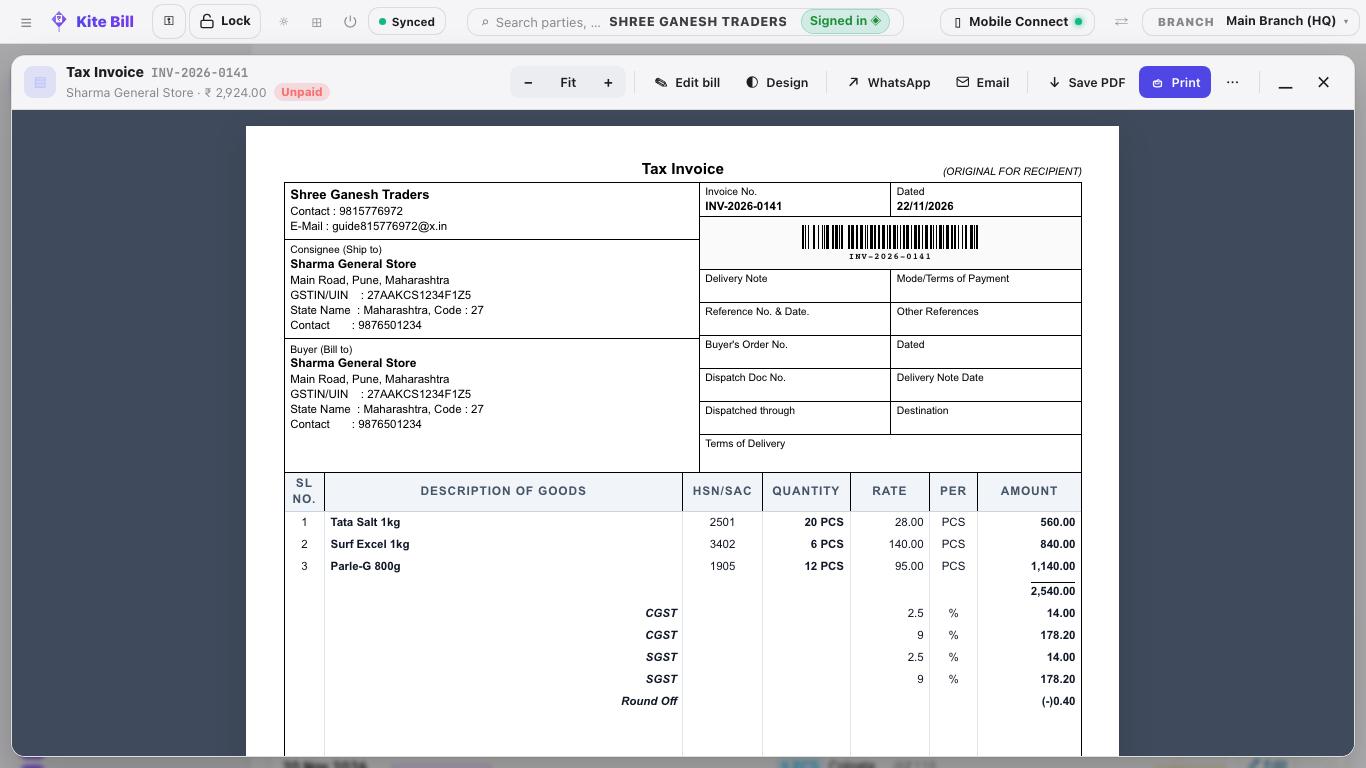
- Print — A4 / A5 on a normal printer, or the thermal slip on a 2-inch / 3-inch receipt printer.
- Save PDF — saves the bill with the customer's name and bill number in the file name.
- WhatsApp / Email — sends the bill with the amount due and your UPI payment link.
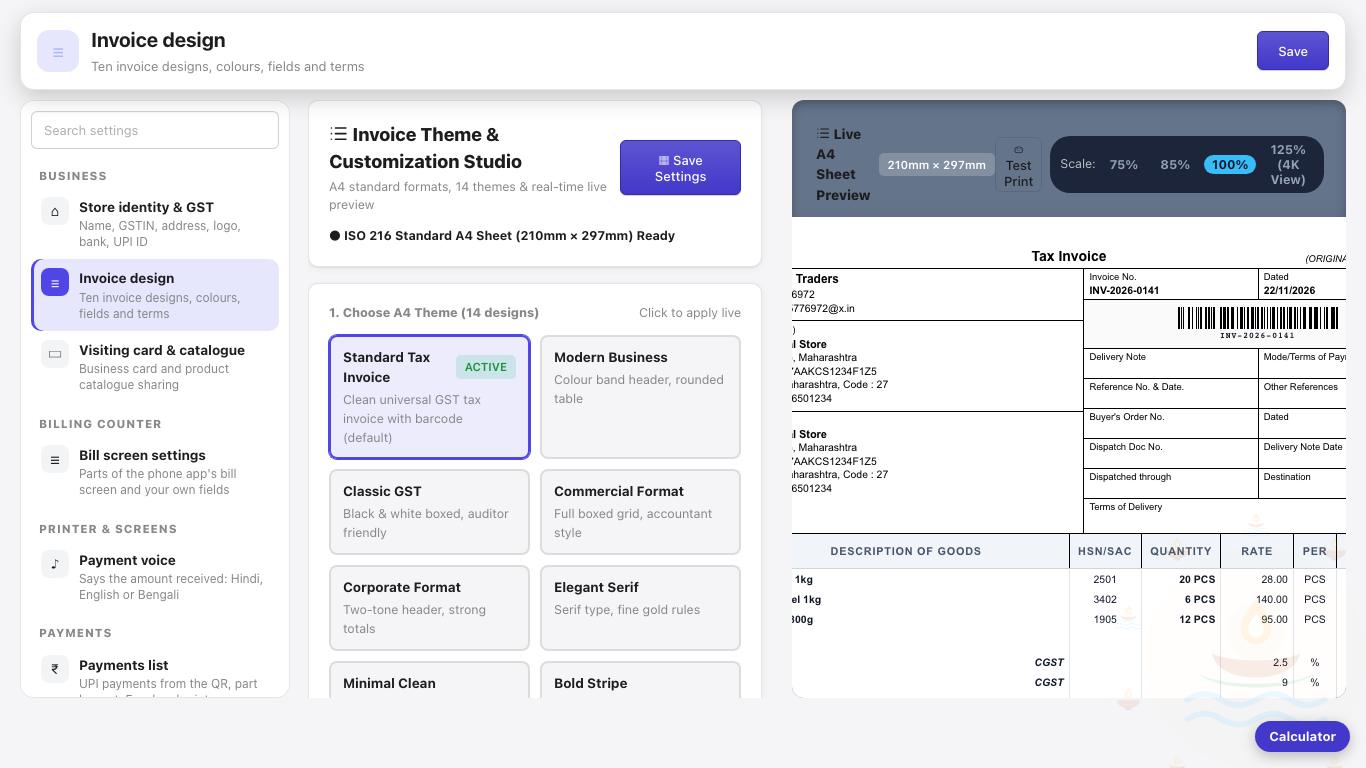
- Design — choose the invoice design, colour, copy label (Original / Duplicate) and which details show.
7Quotations, sale orders and delivery challans
Documents that come before a bill — each can be turned into a bill in one click, so nothing is typed twice.
Quotation / estimate
A price offer to a customer (Alt + Q). When they agree, convert it to an invoice.
Sale order
An order you will deliver later. Mark it delivered to bill it.
Delivery challan
Goods sent without a bill yet (on approval, job work). Bill the challan when it is final.
Recurring billing
Bills that repeat every month (rent, service, AMC) are made on their own.
8Sales returns and credit notes
When a customer returns goods, open Sales Returns, pick the original bill and the items coming back. Stock goes back in, the customer's balance is reduced (or you refund the money), and the credit note is shown in GSTR-1.
9Receiving payments
Money a customer pays later against their bills. Alt + R, or Payments & Collections.
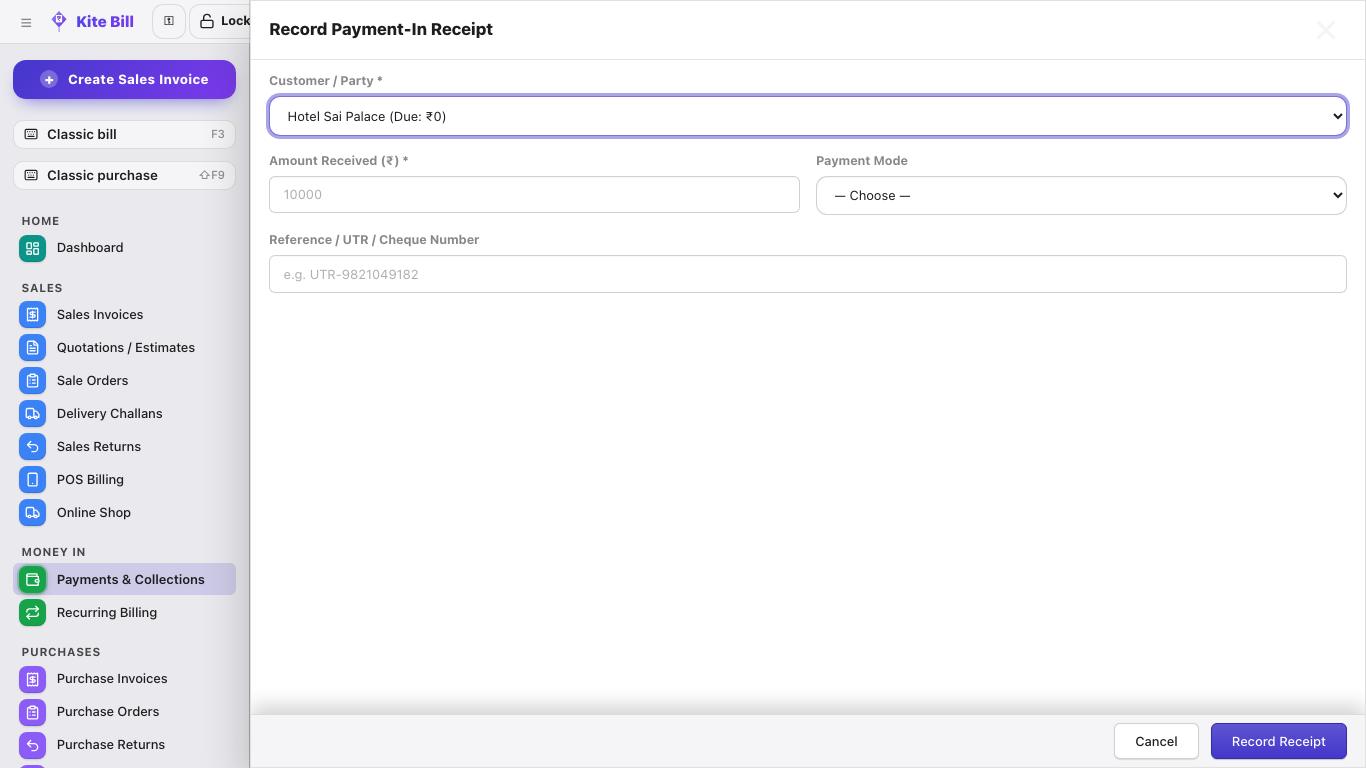
- The customer's unpaid bills are listed; the amount is set against the oldest first, or against the bills you tick.
- A receipt is made that you can print or send on WhatsApp.
- Reminders: on the dashboard, Remind All sends each customer with dues a polite reminder with your UPI link.
10Cash, bank and expenses
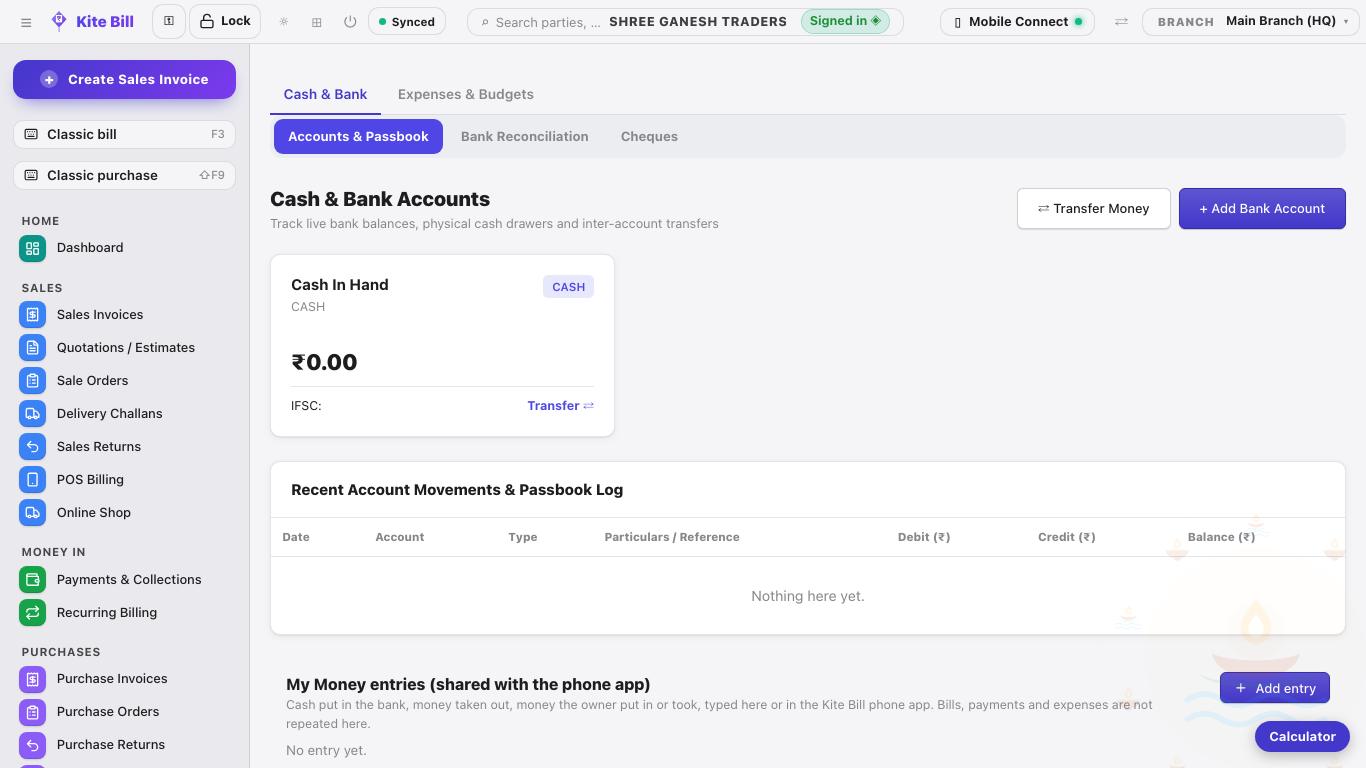
- Cash & Bank — add your bank accounts; every bill paid by UPI / card / bank and every payment made shows in the right account. Move money between cash and bank (contra, F4).
- Expenses — rent, salary, electricity, transport (Alt + E). With GST, the input tax is counted in GST reports.
- Net profit — gross profit from sales minus expenses, month by month.
- Other income, loans, fixed assets, TDS / TCS — for complete accounts and a correct balance sheet.
11Purchase invoices
Every supplier bill you enter adds the stock and the input GST. F9, or Purchase Invoices.
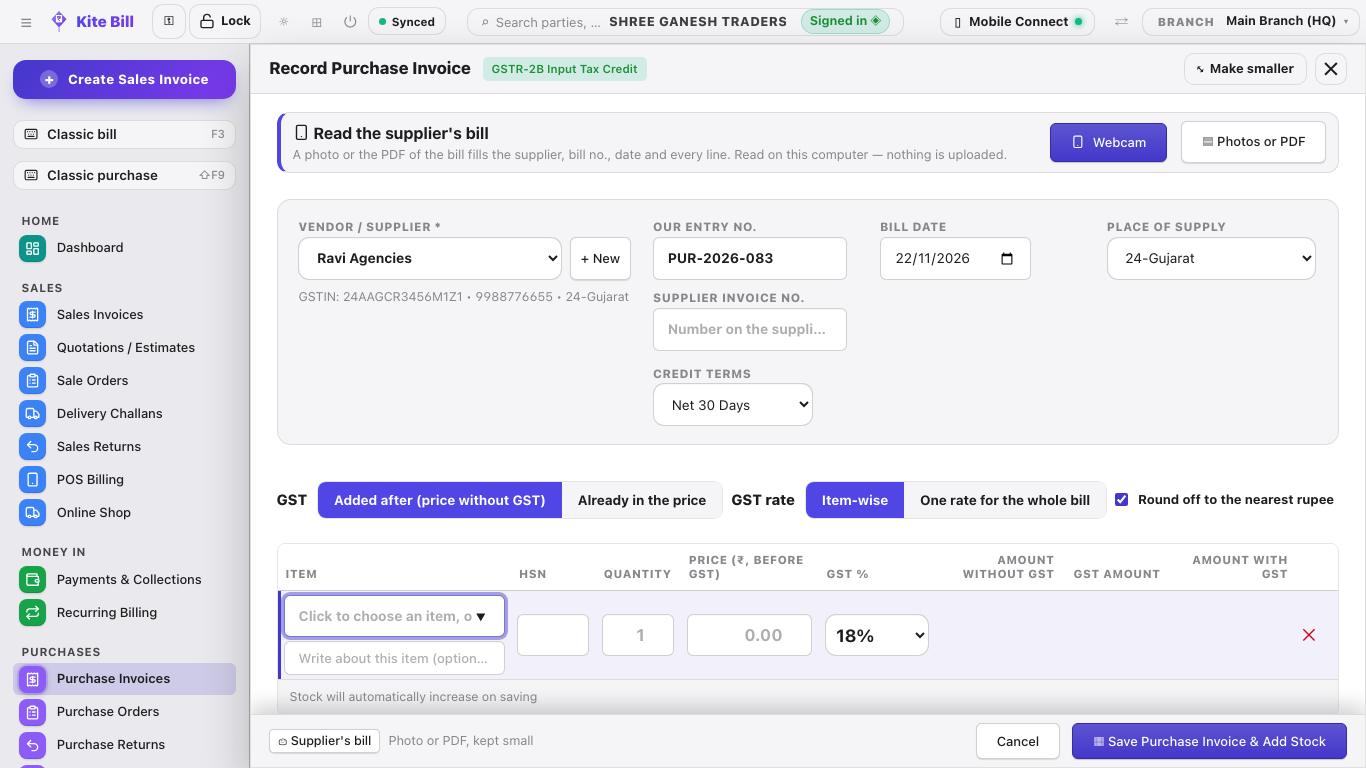
- Read the supplier's bill (optional). Webcam or Photos or PDF reads the supplier, bill number, date and every line for you. It is read on this computer — nothing is uploaded. Check the lines before saving.
- Supplier and bill number. Choose the supplier and type the number printed on their bill. Our entry no. is your own running number.
- Items. Quantity, purchase price and GST for each line. New items can be added here.
- Save. Save Purchase Invoice & Add Stock adds the stock and the amount you owe the supplier. Attach a photo of the bill to keep it with the entry.
12Purchase orders and returns
- Purchase order — what you are ordering from a supplier. When the goods arrive, turn it into a purchase invoice.
- Purchase return (debit note) — goods sent back to a supplier. Stock goes out and the amount you owe goes down.
13Customers and suppliers
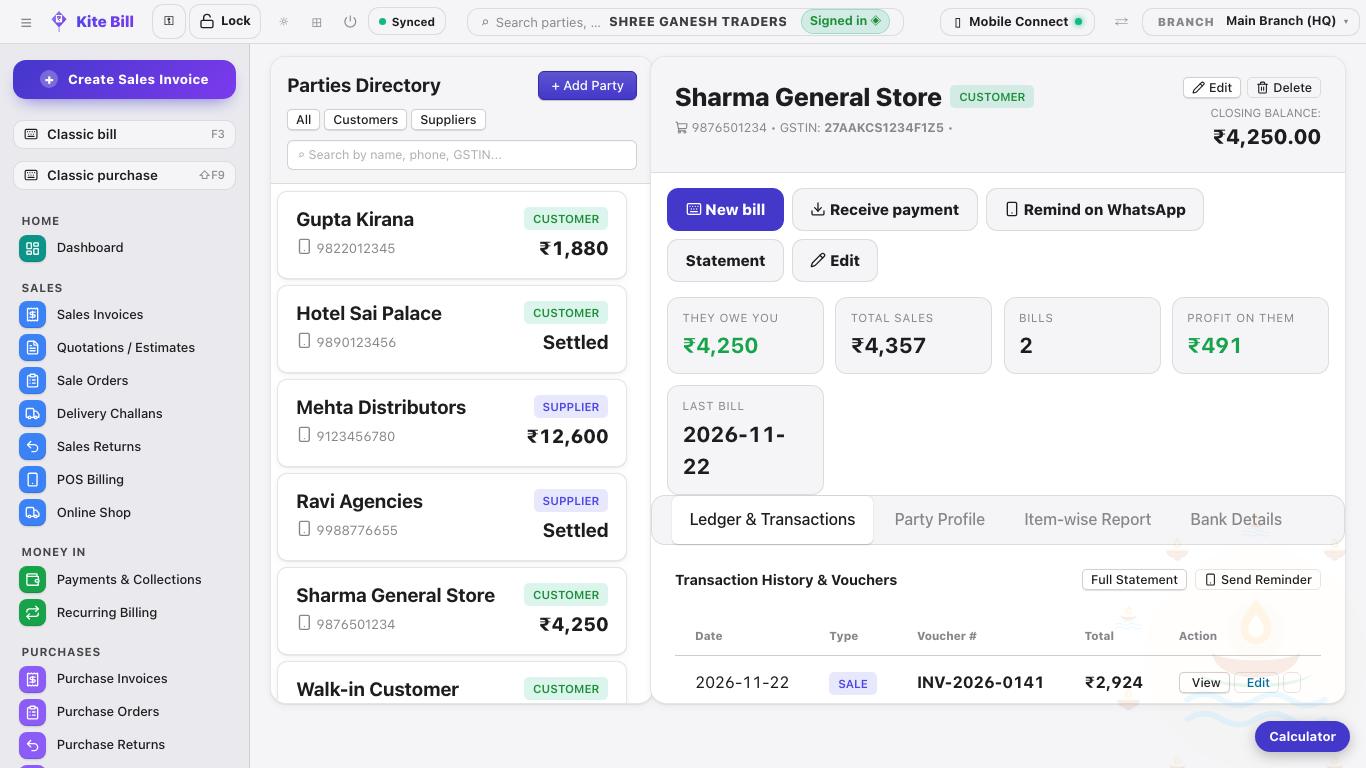
- Add — only the name is needed (Alt + C). Type the GSTIN and the state and PAN fill by themselves.
- Opening balance — what they owed you (or you owed them) before you started Kite Bill.
- Ledger / statement — every bill, payment and return with a running balance; print it or send it on WhatsApp.
- Credit limit and period — Kite Bill warns you before billing past it.
- Loyalty & special prices — points for customers, and party-wise prices for your regular buyers.
14Items and stock
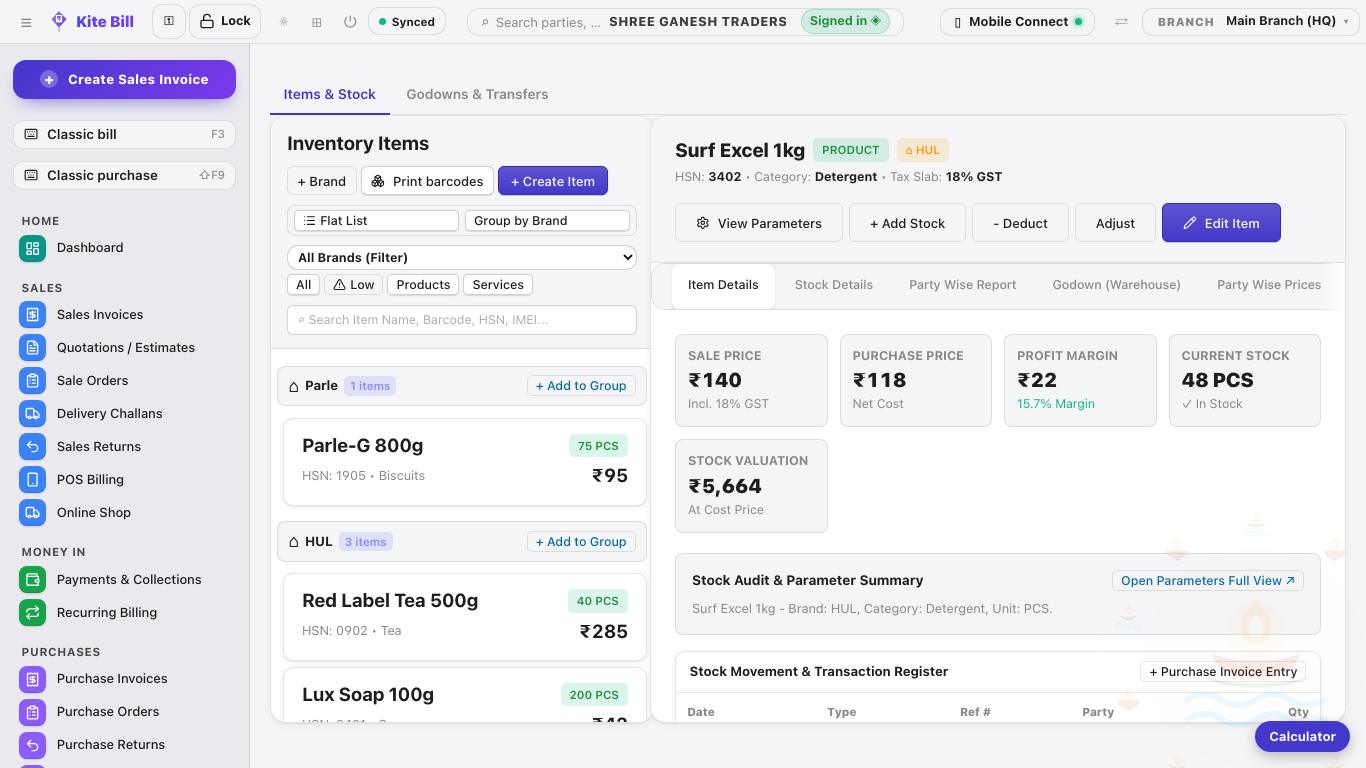
- Add an item (Alt + I) — name, HSN, GST rate, unit, sale and purchase price, MRP, opening stock. A bigger unit (box, bag, case) with how many pieces it holds lets you bill either way.
- Barcodes — use the maker's barcode, or print your own labels with Print barcodes.
- Low stock — set a minimum; the Low filter shows what to reorder.
- Godowns & transfers — stock in more than one place, and moves between them.
- Batches & adjustments — batch and expiry, and stock corrections (damage, count difference) with a reason.
- Item history — every sale, purchase and adjustment of an item.
- Correct an item — the owner can fix an item's name, HSN, unit or GST and carry the correction into older bills.
15GST returns, e-invoice and e-way bill
- GSTR-1 — B2B, B2C large, B2C small, credit notes and HSN summary. GSTR-1 JSON downloads the file you upload on the GST portal.
- GSTR-3B — output tax, eligible input tax credit and the GST to pay in cash.
- Purchase register & ITC — supplier bills with GST, to match with GSTR-2B.
- HSN-wise and rate-wise summaries, and the TDS / TCS register.
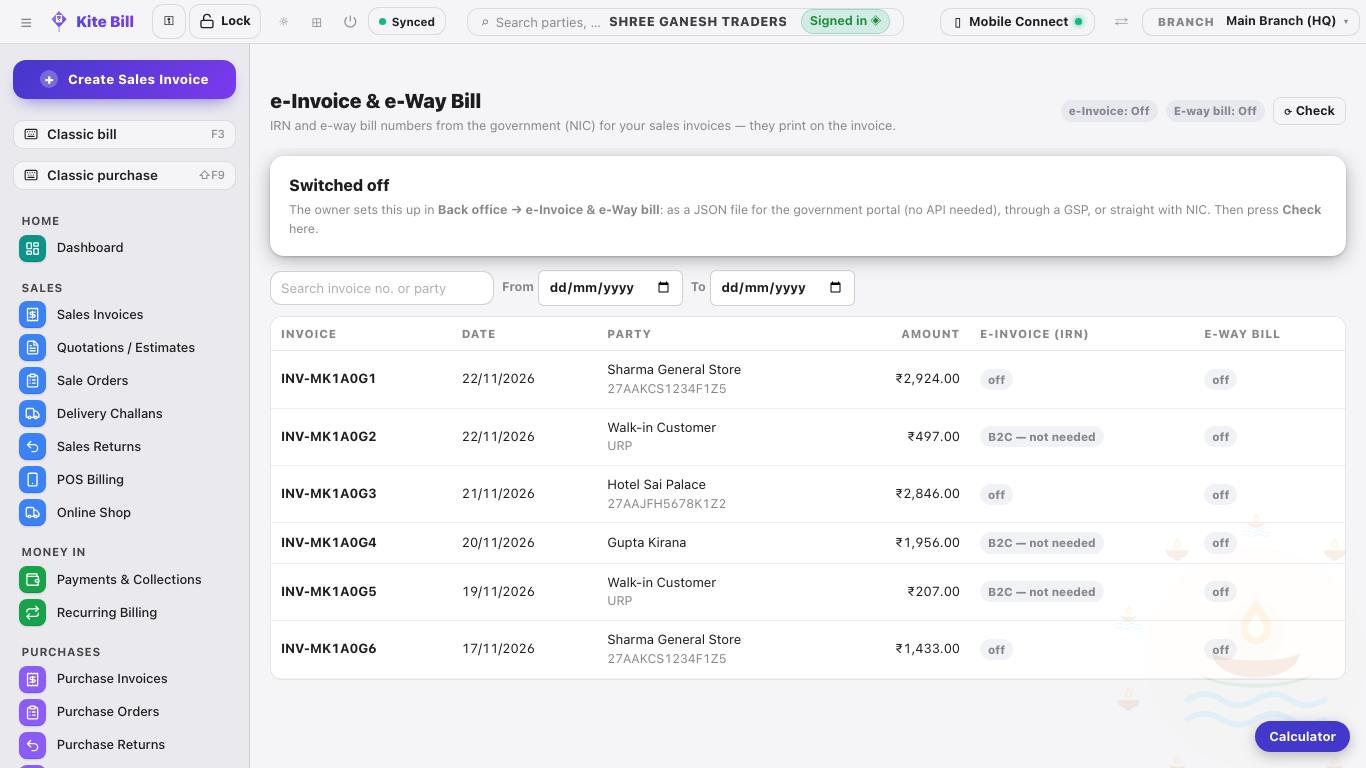
- e-Invoice and e-Way Bill — make the IRN and the e-way bill from a saved bill; vehicle and distance details are asked once and filled for you.
16Reports and day book
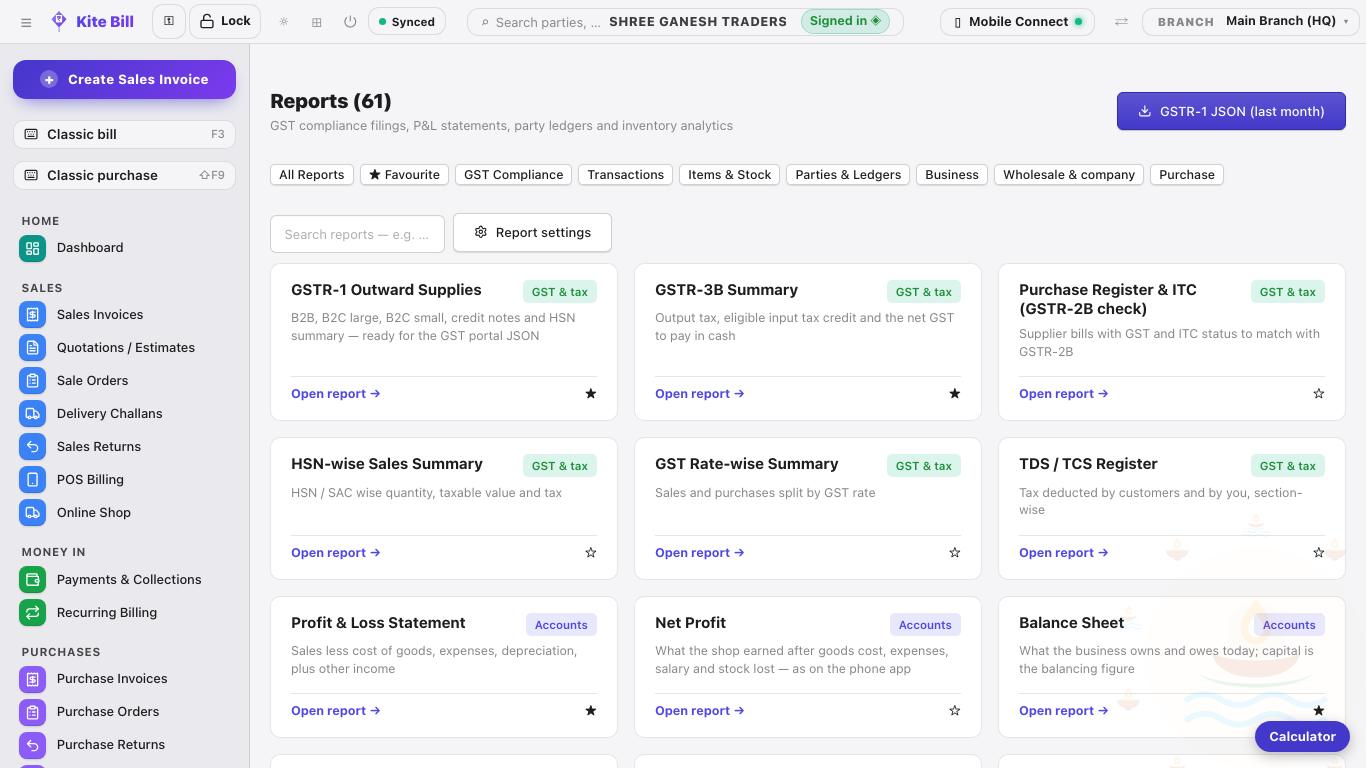
- Search the report list, or filter by group. ★ adds a report to Favourites.
- Every report can be filtered by date, exported to Excel / PDF and shared with your CA.
- Day book — everything that happened on one day: bills, purchases, payments and expenses.
- Profit & loss, balance sheet, net profit — the business picture for any period.
- Audit trail — who changed or deleted what, and when.
17Staff and access
Give each person their own login with only what they need. Back office → Staff & access (owner only).
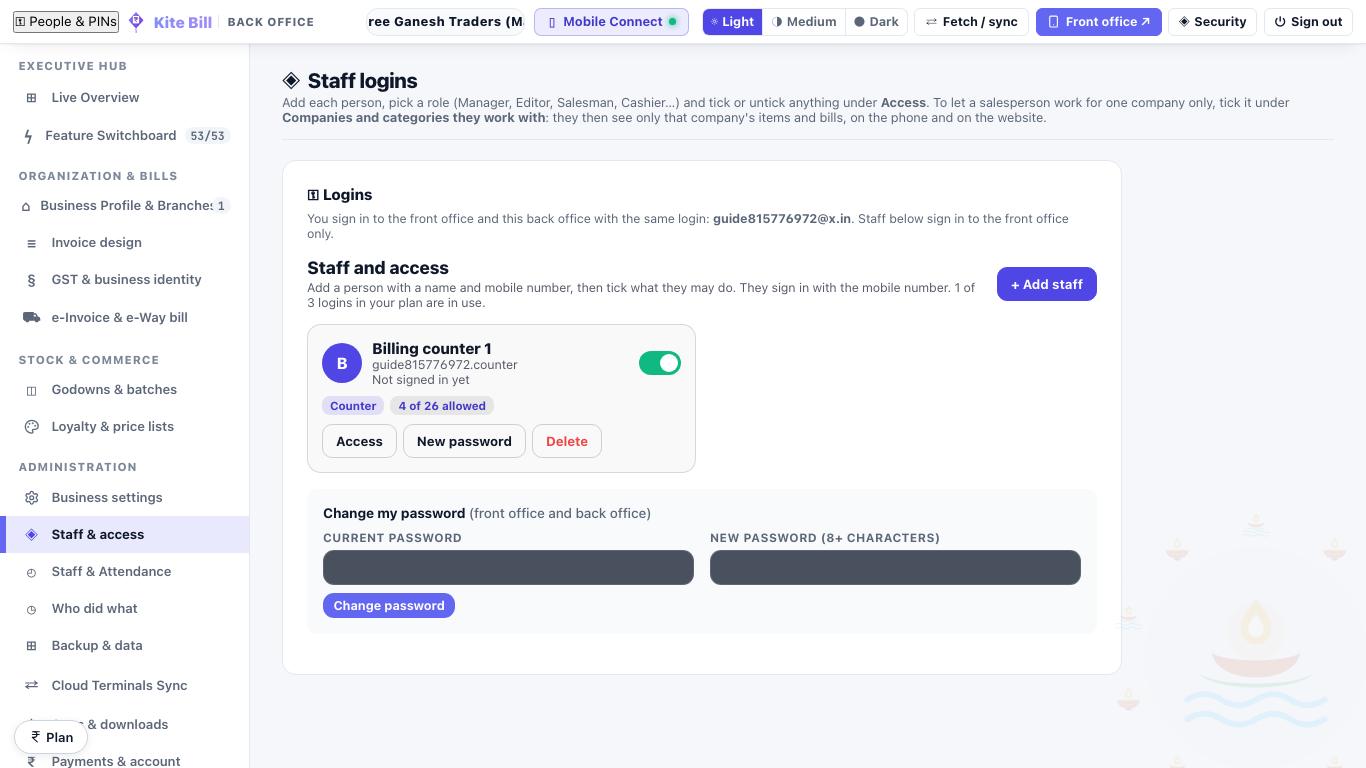
- Press + Add staff, type the name and mobile number.
- Pick a role; it ticks the usual access. Change any tick you like.
- Save. Kite Bill shows the login (mobile number) and a password to give the person.
| Role | Can do |
|---|---|
| Staff | Make and print bills, customers, receive payments. |
| Cashier | Billing and payments, sees sales totals — only their own bills. |
| Salesman | Bills and quotations for their own customers — only their own bills. |
| Editor | Billing with changes, discounts and prices, returns, items and stock, purchases, payments. |
| Stock keeper | Items, stock, godowns and purchases. |
| Accountant | Purchases, payments, cash & bank, expenses, reports and exports, cost and profit. |
| Manager | Everything except managing logins. |
| Viewer | Only reports and totals. |
Staff attendance and salary
Back office → Staff & Attendance keeps each person's profile and ID card, who is in today, the month's calendar and the salary slip. The owner's phone app shows the same records (Settings → Staff attendance and payroll).
- Fingerprint machine — punches read from the K40 / ZKTeco machine count by the person's machine number.
- Shop Wi-Fi — while the Kite Bill computer app is open, a staff member's phone on the shop Wi-Fi marks them in; 15 minutes away marks them out. Give each phone to its person once under Devices. On an iPhone, set "Private Wi-Fi Address" to Fixed (or Off) for the shop Wi-Fi.
- By hand — mark a day Present, Half day, Absent or Leave; your mark always wins.
- Each way can be switched off under Staff & Attendance → Settings. Staff see their own attendance.
PINs, screen lock and owner PIN
- Who is working PINs — on a shared computer each person opens Kite Bill with their own PIN.
- Lock — the Lock button in the top bar locks the counter screen until it is clicked again.
- Owner PIN — asked before a saved bill is changed or anything is deleted.
- Two-step sign-in — a code from an authenticator app on top of the password.
18Phone and computer — one set of books
Sign in with the same login on the Kite Bill phone app, the website and the computer app. They all keep the same bills, items, customers and payments.
- Synced in the top bar means the server has everything from this computer. Sync now (or Shift + F12) checks at once.
- Without internet you can keep billing. The bills wait on the computer and go to the server when the internet is back.
- The same bill number everywhere. A bill shows the number it was given — on the phone and on the computer.
- A change on the phone (a bill's quantity or rate, an item's name, unit or MRP) shows on the computer within a few minutes, and the other way round.
- Mobile Connect links phones to the shop computer over the shop Wi-Fi, so they keep working even when the internet is slow.
19Backup, import and export
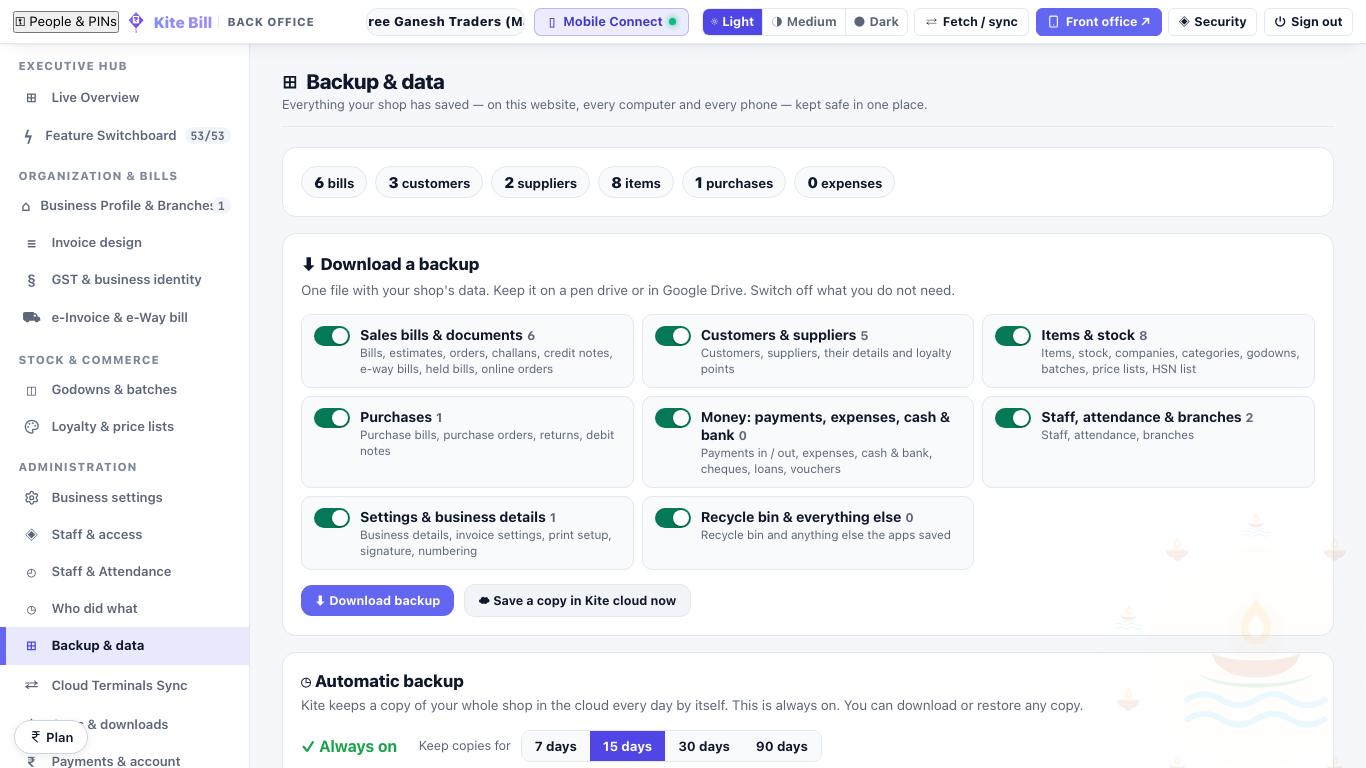
- Backup — your books are kept on the Kite server all the time. The owner can also download a copy and restore it from Back office → Backup & data; the computer app can keep a copy in a folder too.
- Import — items and parties from Excel, or your Tally data, so you do not start from zero.
- Export — every list and report to Excel or PDF, and vouchers for Tally.
20Settings
Two places: the counter's own settings in the front office, and the owner's settings in the Back office.
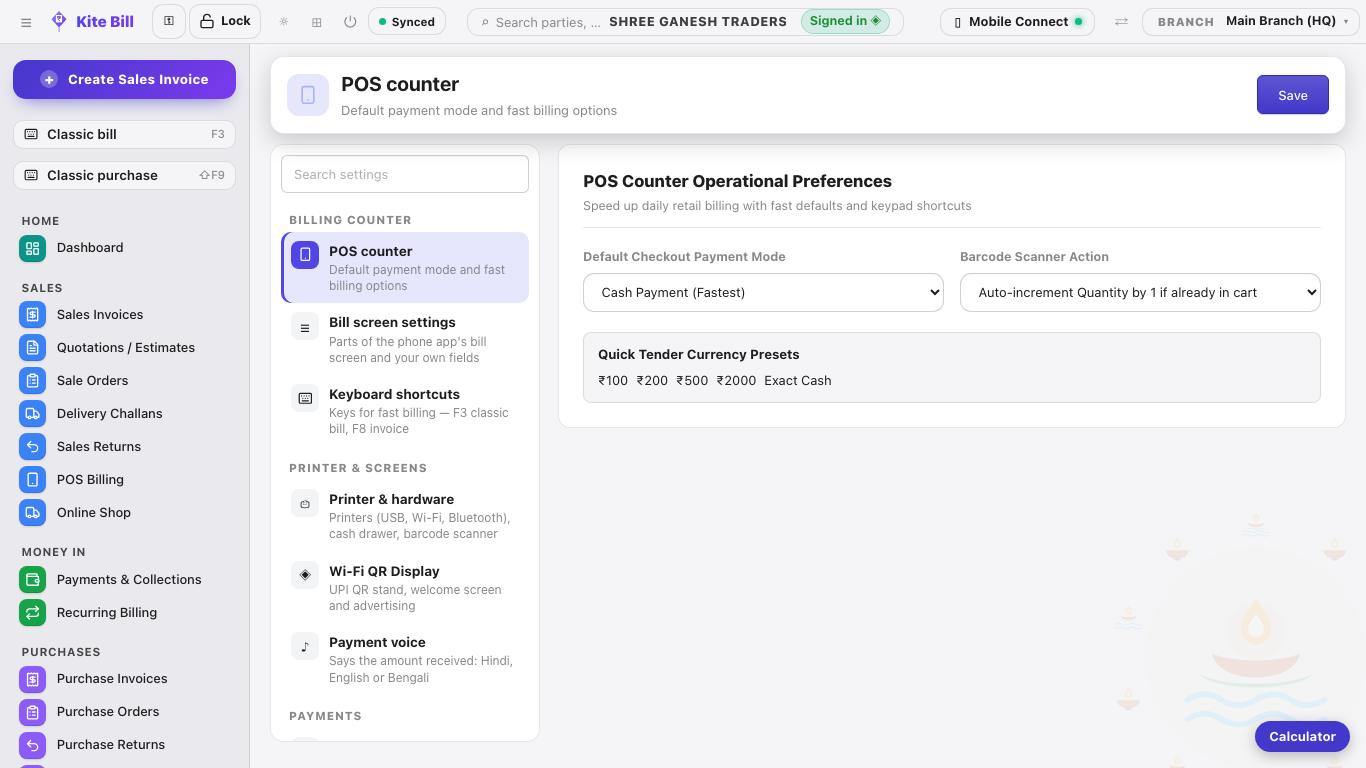
Front office → Settings (each counter)
POS counter
Default payment mode, what a scan does, quick cash amounts.
Printer & hardware
USB, Wi-Fi and Bluetooth printers, A4 / thermal, cash drawer, barcode scanner.
Wi-Fi QR display and payment voice
The UPI QR stand for customers, and the voice that says the amount received.
Display & theme
Light or dark, colour and text size.
Back office (owner)
Business settings
Store identity & GST, visiting card, payment reminders, CA reports, the plan.
Invoice design
Ten designs, colours, details shown, terms, signature and stamp.
Business profile & branches
More than one shop or godown on one login.
Feature switchboard
Switch off what your shop does not use, so the screens stay simple.
21Keyboard shortcuts
Press ? anywhere in Kite Bill to see this list.
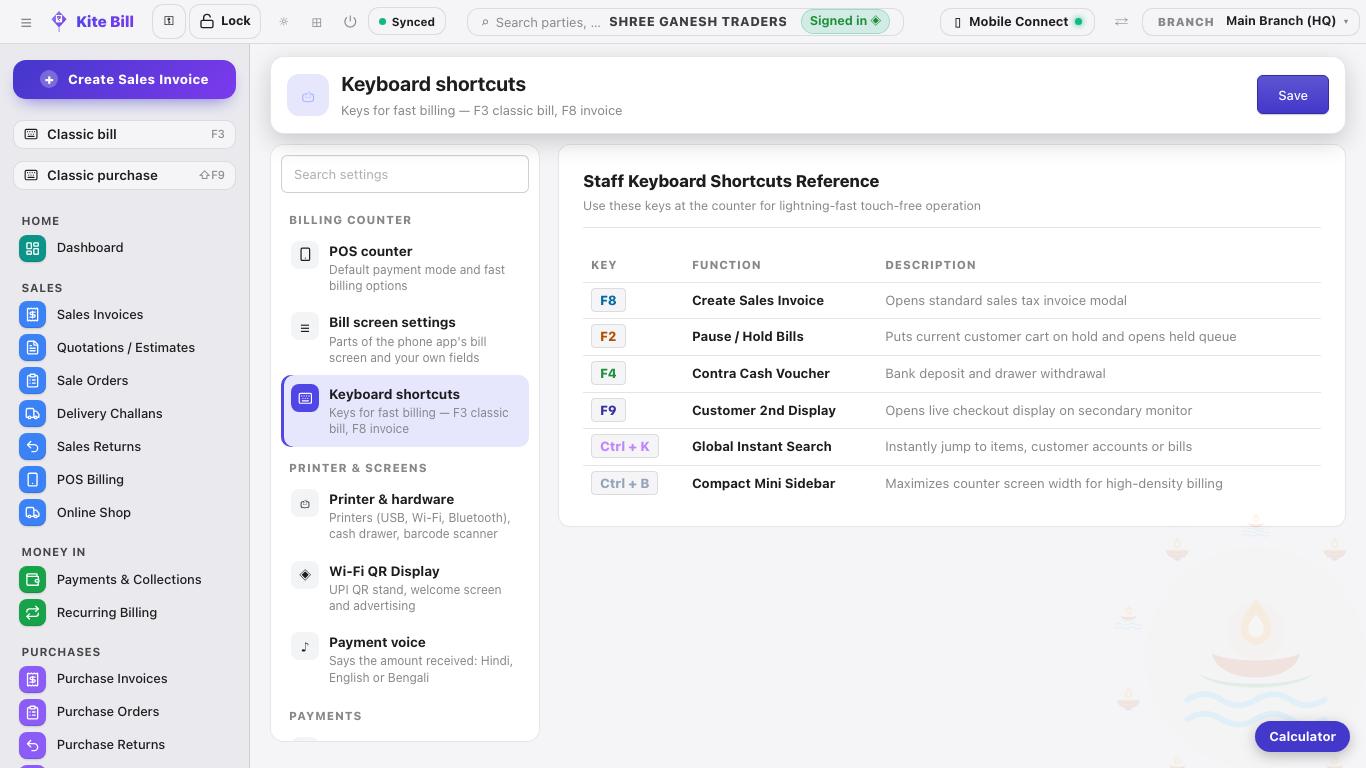
Anywhere
| Key | What it does |
|---|---|
| F8 | New sales invoice |
| F3 | Classic bill — from the keyboard |
| F9 | New purchase invoice |
| Shift + F9 | Classic purchase entry — from the keyboard |
| Alt + Q | New quotation |
| Alt + R | Receive payment |
| Alt + E | Add expense |
| Alt + I | Add item |
| Alt + C | Add customer / supplier |
| Alt + D | Dashboard |
| Alt + S | Sales invoices list |
| Alt + L | Reports |
| Alt + G | Accounts menu |
| F4 / F6 / F7 | Contra / receipt / journal voucher |
| Ctrl + K | Search |
| Ctrl + B | Fold the side menu |
| Enter | Next box in a form (the last box saves) |
| Ctrl + S or Ctrl + Enter | Save the open form |
| Esc | Close the open form |
| ? | Show the shortcut list |
POS counter
| Key | What it does |
|---|---|
| F1 | Search / scan barcode |
| F2 | Customer |
| F3 | Item box |
| F4 | Pause the bill |
| F5 | Held bills |
| F9 | Cash payment |
| F10 | UPI QR |
| F11 | On credit |
| Esc | Clear the cart |
The classic bill's keys are in section 4. On a Mac, use ⌘ where this guide says Ctrl.
22Problems and answers
The phone and the computer show different bills or totals
Look at the dashboard line Same as the server. Press Sync now on the computer and pull down to refresh on the phone. If one of them still differs after a few minutes:
- Check the internet on that device — bills made offline wait there until it is back.
- Check your plan: when a plan has ended, Kite Bill opens in view-only mode and new changes are not saved to the server until it is renewed.
- Still different? Write to info@kite.company with the two numbers the line shows.
A staff member cannot see a menu or cannot make bills
The owner decides what each login can do. Open Settings → Staff & access, edit the person and tick what they need (for example Make bills, Receive and make payments). It counts the next time their Kite Bill opens.
I cannot see the Save button on a small screen
The Save bar is fixed to the bottom of every form. If your screen is very small, press Ctrl + S to save, or Ctrl + − to make everything a little smaller (Ctrl + 0 brings it back).
The bill does not print, or prints too small
Check Settings → Printer & hardware: choose the right printer and paper (A4, A5, 2-inch or 3-inch thermal). For a thermal printer, set the paper width in the printer's own settings too.
GST is calculated twice, or the price looks wrong
Check Price I type is on the bill. If your selling price already includes GST, choose Including GST; if GST should be added on top, choose Excluding GST.
I forgot my password
On the sign-in screen press Forgot password? and follow the code sent to your email or mobile. Staff passwords are reset by the owner in Staff & access.
How do I move from Tally or another software?
Import your items and parties from Excel, or use the Tally import. Opening balances can be typed on each party, or brought in with the import.
Kite Bill Guide · Pictures show a sample shop · Back to the top